The pumpkins and gourds have been tossed over the fence to what I refer to as
the Deer Yard. This is the part of the back, below the fence (that they frequently
jump), that I freely give to the wildlife at the little house on the big hill. In early
January, this is where the Christmas tree will have a new purpose of providing
shelter for the small critters that roam the wooded area.
With a clean slate, I will begin to create my outdoor holiday displays.
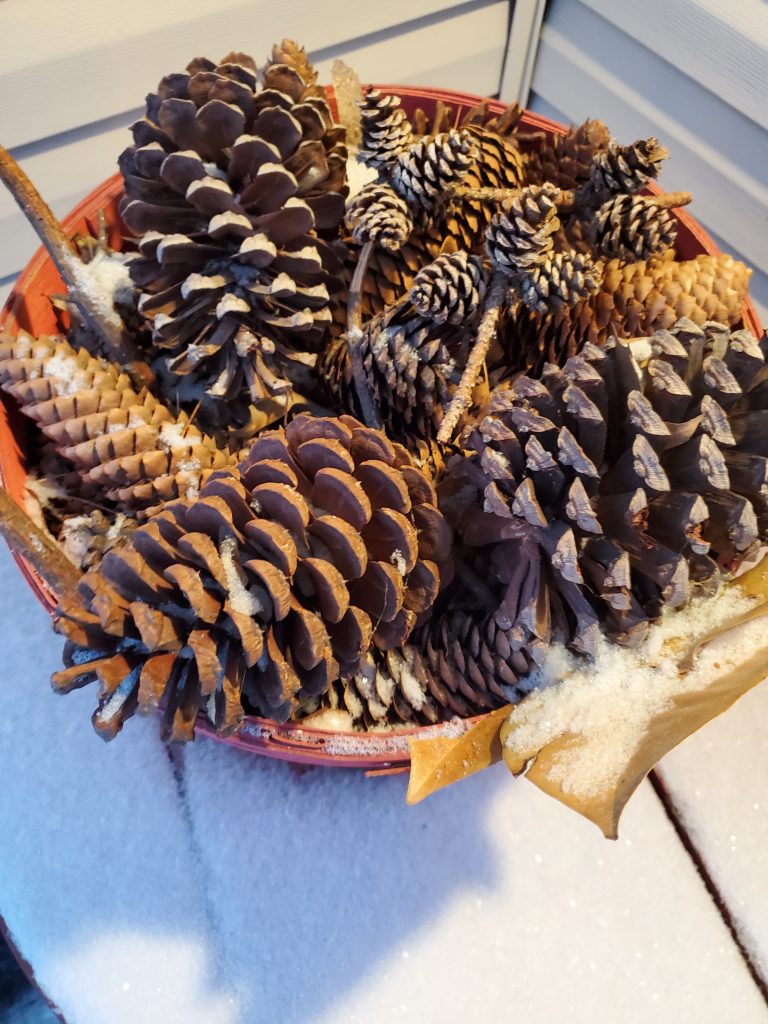
I keep it simple. I frame the front porch with lights and greenery. Then add a few
baskets of pinecones that were gathered in the woods years ago. Just like
treasured ornaments, the pinecones are attached to memories and folks of my
past. Funny how a big old basket of oversized pinecones can make me feel all
warm and fuzzy.
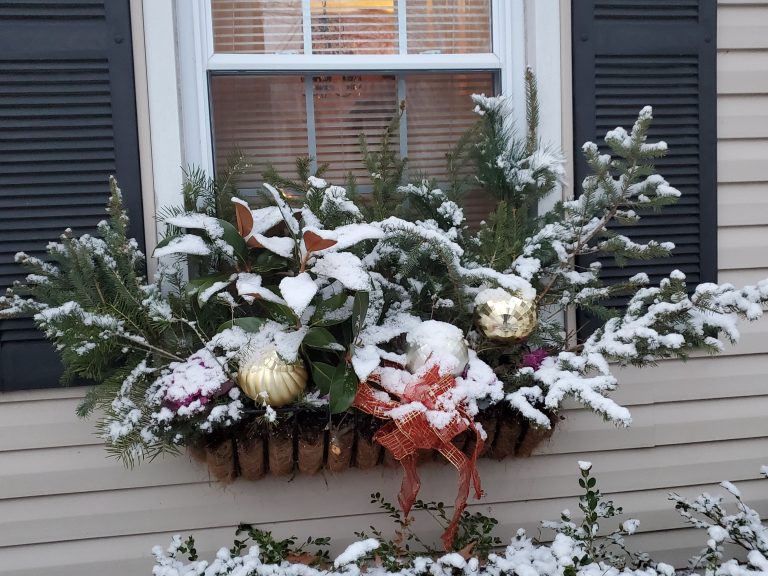
My window boxes get the most attention. I have fun hunting and gathering
pieces to create the designs.
I start with pine branches. I often use the bottom branches that are cut from my
Christmas tree. Most vendors have extras and will sell a bundle for a reasonable
price. I might use six or more in each box. I anchor them deep into the soil, with
some branches lying low on the right and left sides, and some more upright to
gain height.
I do not color within the lines. I let the branches reach far beyond the sides of
the window box. I like the tall arrangements that can be seen from the street and
from through the windows inside.
Feel free to mix the pine types. The different colors and textures of the pines will
add to the design. Look for blues and lighter green stems to add to the boxes.
Think cyprus or blue spruce for added color. This might mean a walk through your
backyard, the nearby woods, or other market booths. Gather greenery from
everywhere and let them blend together like in the forest.
2
With the pines in place, I add magnolia. I love the leaves. Shiny green on the top
side and soft brown underneath. In the past, I have raided a neighbor’s tree or
bought them from the market.
I have a holly tree in the back. This tree and I have a love-hate relationship. It is
beautiful, and the berries feed the birds, but those darn leaves are sharp and can
hurt as they dry.
Now that the boxes have a solid base – katy bar the door – anything goes.
Eucalyptus stems, hydrangea blooms, red twig dogwood sticks, or other curly
stems to give height and a new element of texture to the boxes.
I have even seen small evergreen trees planted in the boxes. Anything goes.
When I feel like I have maxed out the plant materials, I begin to add holiday
ornaments, shatter-free, of course. I tie them to the evergreen stems to keep
them secure from wind and animals. I use large oversized, but again, there are no
rules.
You might like nutcrackers standing tall, birds sitting on the pines, or snowmen
nestled in to welcome guests.
As you design, keep in mind our summer mantra of filler, spiller, thriller. This is a
proven method for all container arrangements. The winter spiller might not be a
trailing vine but can be achieved by letting the pine lie outside the box sides.
Once the greenery is in place, the ornaments and decorations have been added,
the boxes are almost done. Lights could be added at this point. If you have
outside electric -great. If not, and you want lights, there are fun and festive solar
options available.
My last step is to finish the design with a bow. Often this is a big, oversized bow,
made from ribbon that coordinates with the ornaments or other bows around the
front of the house.
I will pull the ornaments and bows after the holidays, but leave the greenery in
place until late February.
I have window boxes, but these design ideas can easily translate to a porch or
driveway containers. Be creative. Be resourceful. Have fun. These arrangements
3
are a way for gardeners and creatives to have a little fun outdoors while the
garden beds are taking a long winter’s nap.